
Hi-ya! So I've been into jewelry making for the past 4-5 months, but never actually do it, so i decided to order some jewelry making stuff and make my own! You can make tons of other type of jewels with this method, just use your creativity.
I'm going to show how to make 2 different bracelets today, this is the basic method, very easy and simple. I am planning on doing other types of jewelries in the future since i bought some wires (for wire jewelry making), pendants, and bases (earring bases and ring bases).
WARNING: Tons of pictures are coming your way ;)
What you'll need:
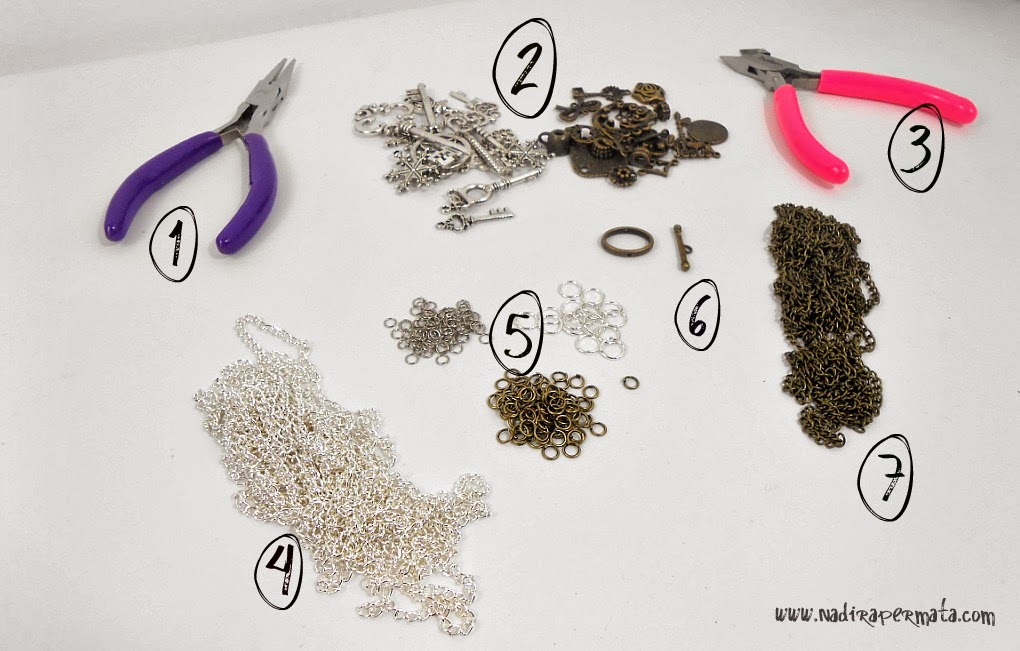
- Round-nose Plier
- Pendants of your choice
- This is not necessary, i recommend using 2 round-nose pliers instead of using this, i don't have another one so i'm using the wire cutting plier
- 4 & 7 : Plain chain for jewelry making (I have silver and antique brass, you can use any color you want!)
- Jump rings
- Tbh i have no idea what these are called, i'm just gonna call it a connector (this is the old fashioned style, you can use a lobster clasp too!)
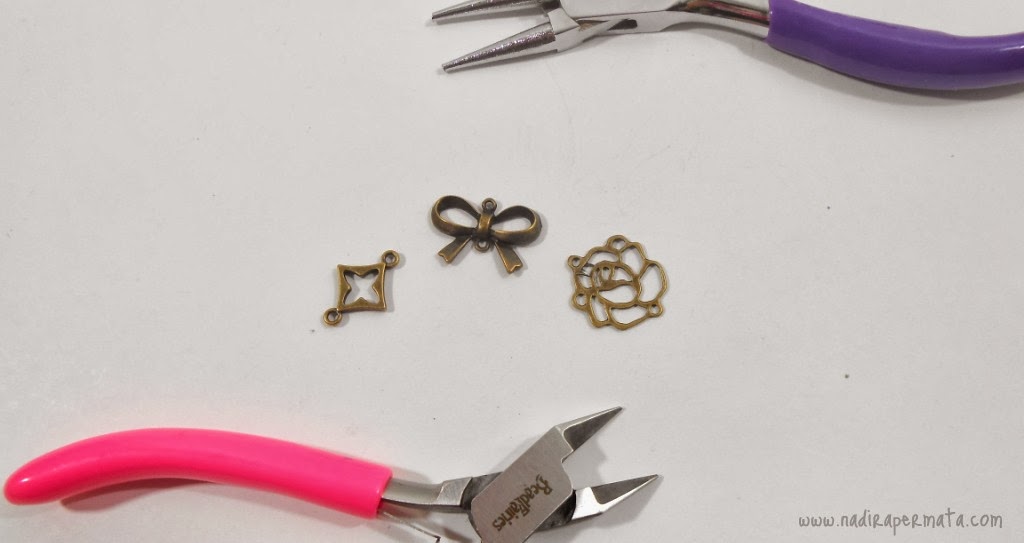
Here's a closeup pictures:


Bracelet #1
STEP 1


- Wrap the chain around your wrist to measure the length. After that cut the chain.


- Grab a jump ring and open it. Take a look of the first and second picture to see how to open it correctly. Do not stretch the jump ring, instead, grab the ends with the pliers and push one up and one down. Because if you stretch it, the jump ring wont close perfectly causing the chain to slip off. After that, take the connector and connect the end of the chain we just cut with it using the jump ring. By now you've done the base of the bracelet!


- This is the fun part! You can use any pendant you'd like for this part. I decided to use a key, a telephone, and a clock pendant. Simply use a jump ring to connect them to the bracelet! If you want it to be detachable, you can replace the jump rings with lobster clasps and voila, you got yourself a charm bracelet!
STEP 1
- Repeat step number 1 and 2 from the first bracelet


- Fold the bracelet base in half to determine the middle, and then cut it.


- Pick the pendant of your choice. Just make sure it has double ends. Then with the jump ring, connect them together. As easy as that! And there you have it!


You can wear these bracelets or put it in a box and give it as a gift! Not only it's easy and pretty, it's also affordable. I believe none of the things i used cost more than $5 each!
Every single of the things i used can be found at eBay and yes i did buy everything from eBay. Here's the link of some of the things i bought.
* A Pack of 14 Silver Key Pendants: http://bit.ly/1kyUGjp
* Jump Rings (I used the 5mm): http://bit.ly/1e2qc1w
* Chain: http://bit.ly/1mW3Bgs
Just a reminder: I bought some of the pendants and a couple of other stuff on october so the listings already expired and i couldn't find the new ones. Here's the keywords i used:
* Lobster clasp
* Pendants
* Key pendants
* Jewelry findings
FTC: This isn't a sponsored post. The links are not affiliate links.
Thank you for reading, hope it helps you at some point!
Xoxo

4 Comments
Creative banget^^
ReplyDeleteThank youu dear :D
Deletethank you for sharing this idea! love the charm bracelets that you made :)
ReplyDeletexx,
felishmichelle.blogspot.com
You're welcome! And thank you :)
Delete